Getting Started with BTCPay Server
This guide walks through the setup and configuration of your personal BTCPay Server. BTCPay Server is a free and open-source cryptocurrency payment processor which allows you to accept/spend bitcoin & lightning with no third-party. We use it as the backend Node configuration to Zeus & Sparrow Wallets.
Prerequisites
Before starting, make sure you have run the ripsline installer on your Virtual Private Server (Virtual Private Node)
Get Started
Follow the steps in your credentials.txt file, provided in ripsline order details email, to deploy your Node.
Step 1: Access the Dashboard
After the installer completes, navigate to your BTCPay Server URL in your web browser. You should see the registration or login screen:
 The BTCPay Server login screen - create your admin account here
Create your administrator account by entering your email address and a strong password. This will be your main account for managing the server.
Step 2: Create Your First Store
Once logged in, you'll need to create a store. A store represents your business or project and contains all the settings for accepting payments. For non-merchant users you can name it anything:
 Creating your first store in BTCPay Server
Enter your store name and configure the default currency (USD, EUR, etc.). You can customize these settings later, including:
- Default payment currency
- Invoice expiration time
- Price display format
- Store branding and appearance
You can create multiple stores on a single BTCPay Server instance. This is useful if you run multiple businesses or want to create different hot/watch-only wallets.
Step 3: Configure BTCPay Lightning Node
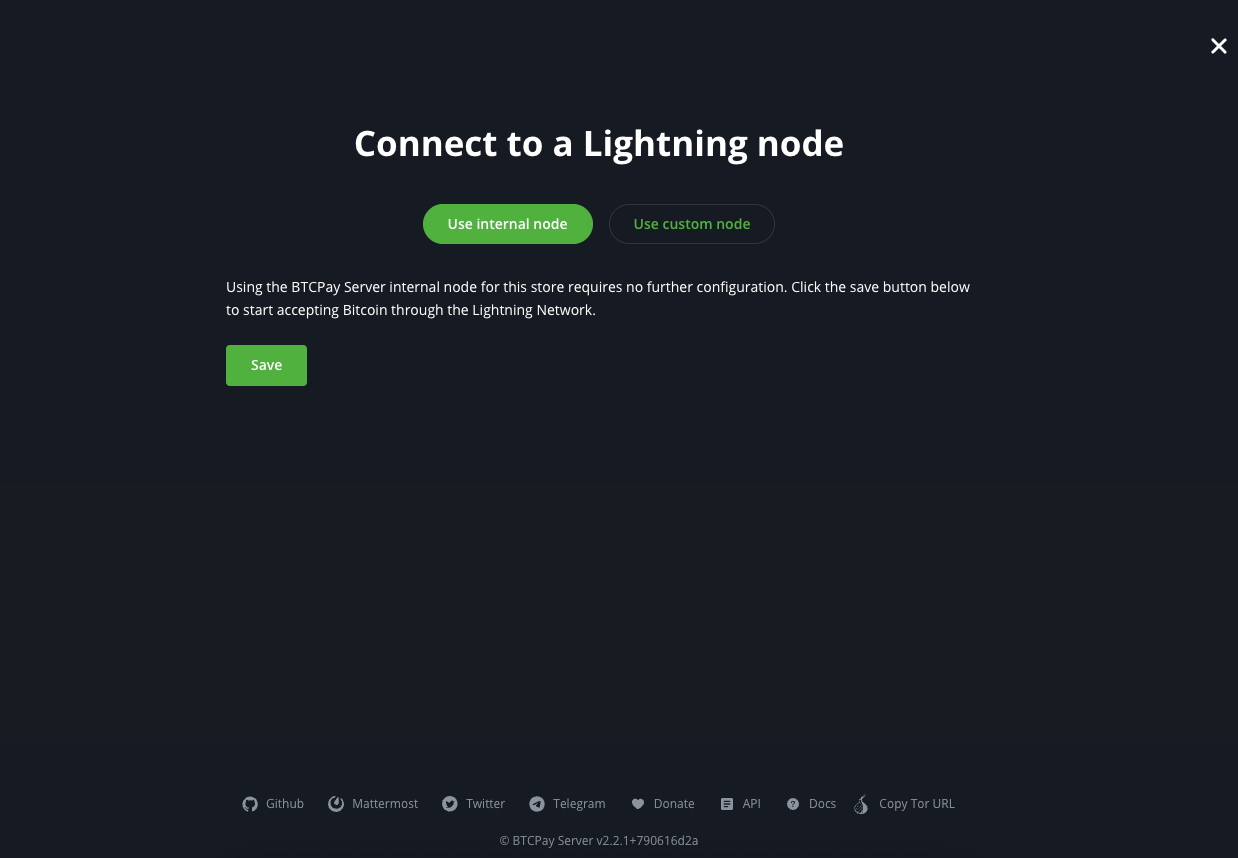
Navigate to "Lightning" underneath "Wallets" on the left-hand navigation panel. Leave default "Use internal Node" then click "Save":
 You will notice a red dot "Lightning" on the left-hand navigation panel until your bitcoin Node is fully synced.
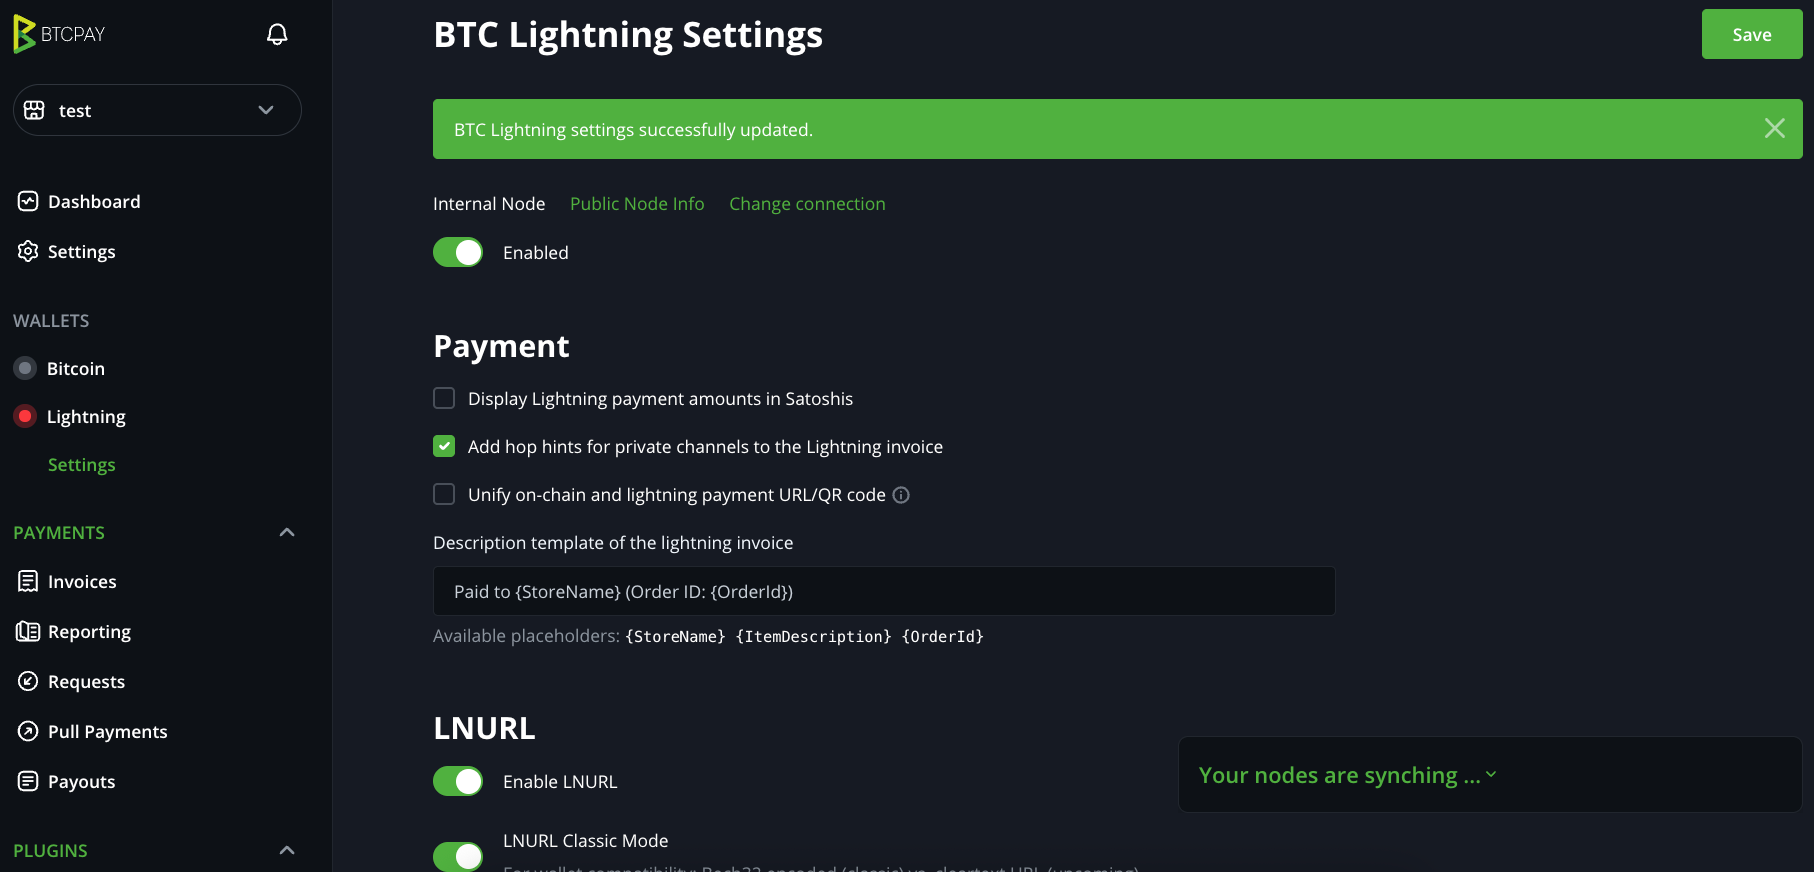
Navigate to "Settings" underneath "Lightning" on the left-hand navigation panel. Select the box "Add hop hints for private channels to the Lightning invoice" then select "Save" top right:
 Add Hop Hints to Receive to Private Channels
You can use "Ride the Lightning" or "Lightning Terminal" within BTCPay to open/manage channels and send/receive funds but we envision Zeus Wallet. Connect to Zeus Wallet
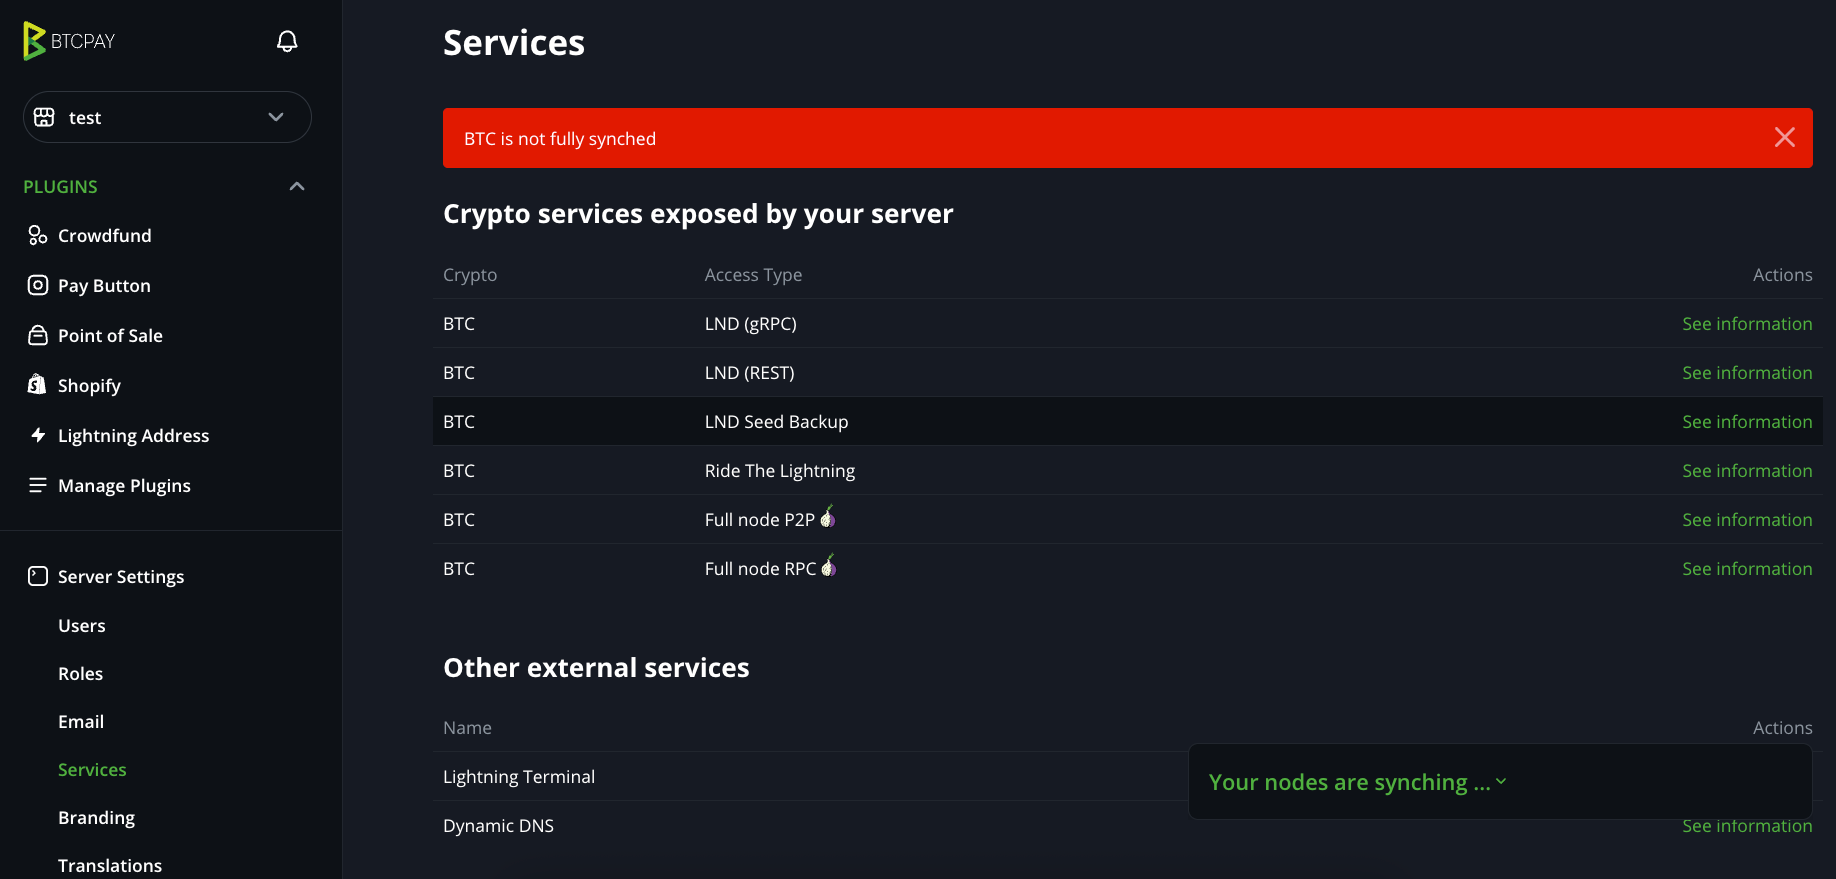
Be sure to write down and store safely your 24-word Lightning seed phrase: Left-hand navigation panel, "Server Settings" → "Services" → "LND Seed Backup" → "See information" → "See confidential seed information":
 Cannot "See information" until BTC full sync
Step 4 (Optional): Create Watch-only wallet
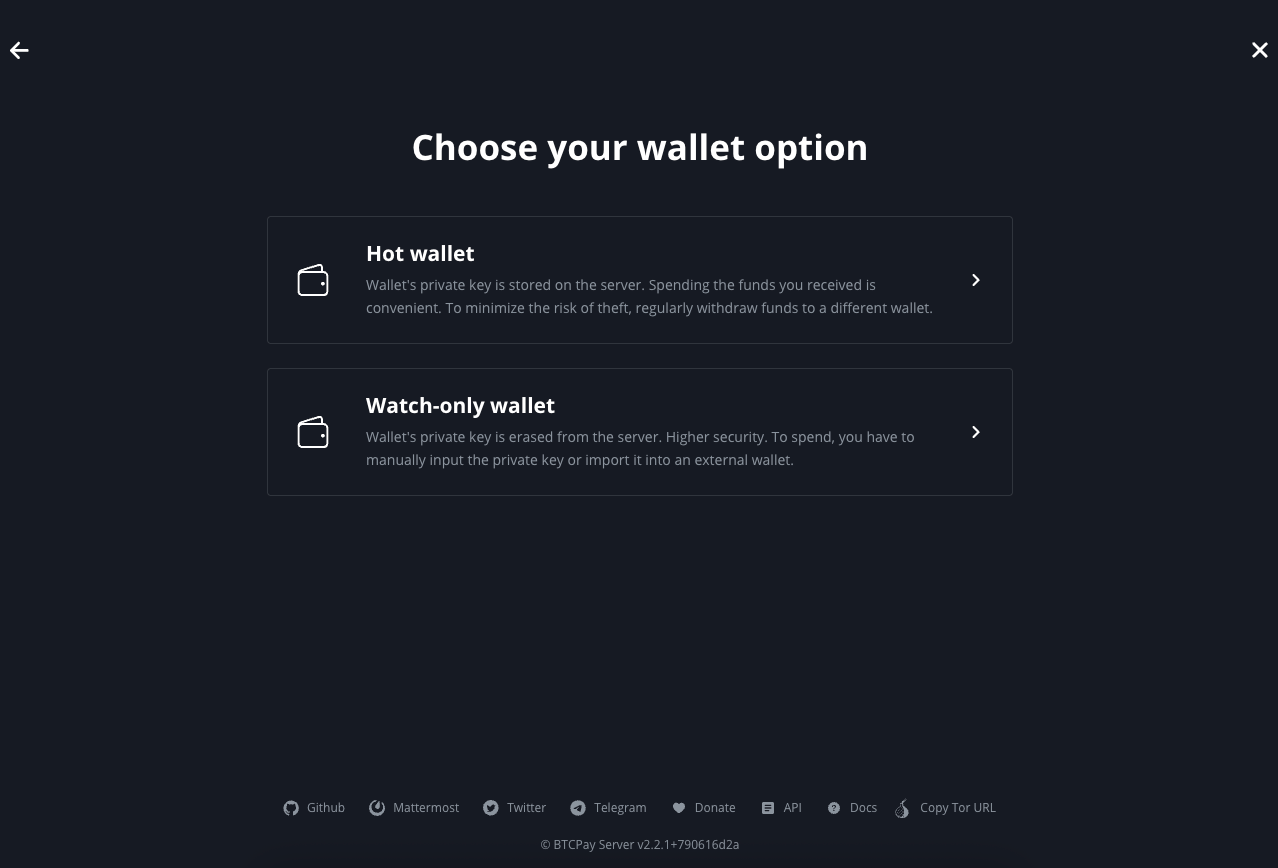
a. Navigate to "Bitcoin" underneath "Wallets" on the left-hand navigation panel. Select "Create a new wallet":

b. Select "Watch-only wallet" → leave default settings on "Create BTC Watch-Only Wallet" screen → select green "Create" button.
c. Write Seed Phrase on Paper!
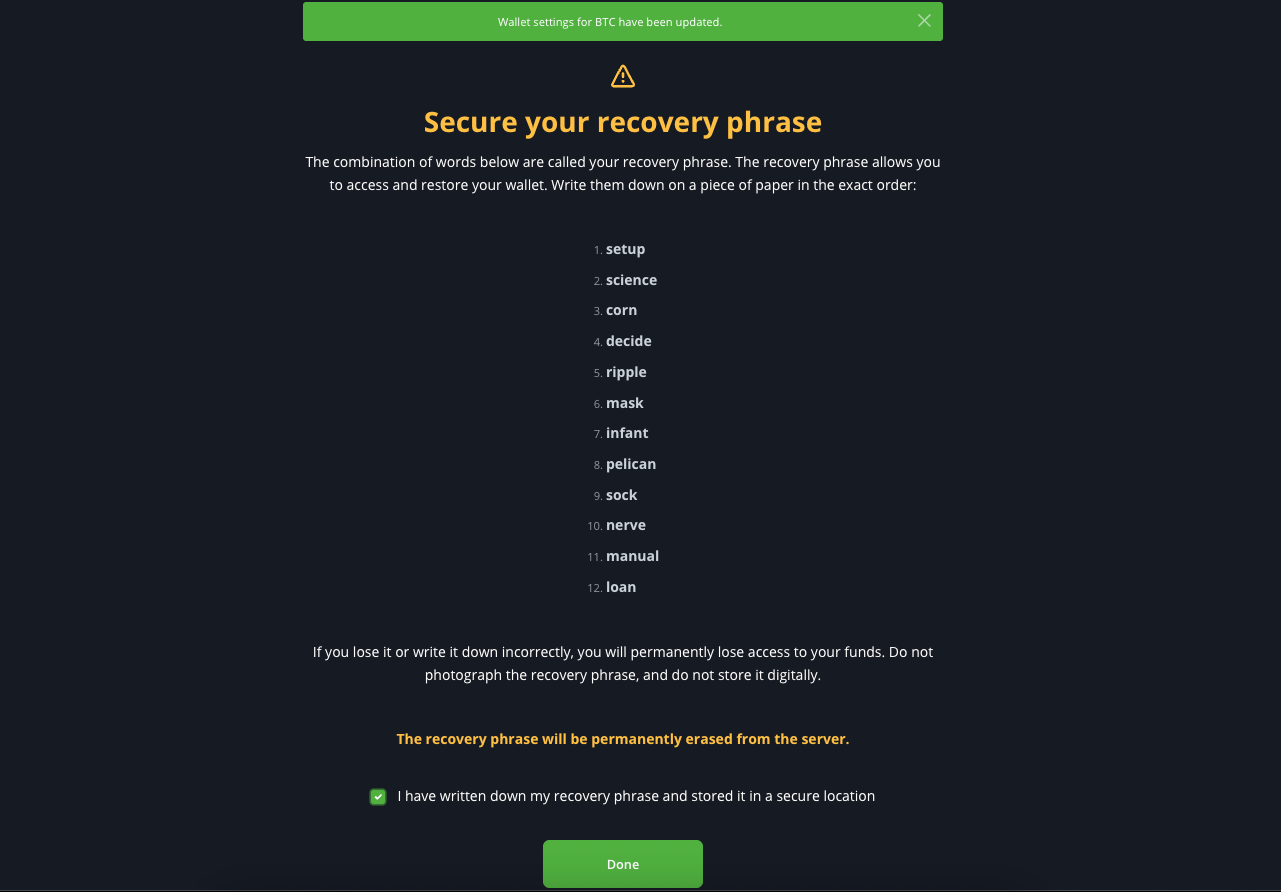
This is a great option for merchants who want to accept on-chain payments. You have receiving power and your seed phrase is not stored on your Virtual Private Node.
Never keep a digital copy of your seed phrase, only physical, keep somewhere safe. Never share your extended public key (xpub) publicly.